Tuesday, July 31, 2012

Cook a Classic: White Wine Mussels with Sourdough Bread


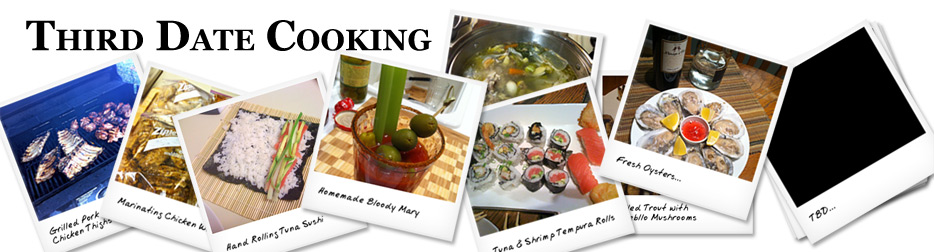
What says "I-know-this-dish-could-possibly-get-you-sick-but-I'm-that-good-that-I-guarantee-you-won't-get-sick-and-you'll-be-extremely-impressed?"

(When in reality, its quite easy to pull off.)

What's classy but not over the top?

What's ballsy but avoids the blow torch?

 "Yeah... you know... the local fish monger said that the Prince Edward Island mussels were in season. I thought we'd have a little treat and I'd cook up some fresh mussels with a white wine sauce and some freshly-baked sourdough bread."  (In a dead-panned, very casual tone)

Boom. Mussels. The tried and true French classic of white wine mussels accompanied with crispy sourdough bread dish is simple, yet elegant.

She'll be impressed with your ability to add wine to something other than a wine glass, your confidence in cooking shellfish, and your forethought in going to the store the day of to buy fresh seafood.


I won't lie. You can screw this up. And the screw up scale ranges from: "Ooops I forgot to add salt" to "Here, I'll hold your hair back while you throw up the ocean..." But before you stop reading, just stick to these three DO NOT GET HER SICK rules and you'll be fine:
  1. Buy fresh mussels the day of the date! DO NOT tie off that plastic bag in the grocery store! They need oxygen to breathe. They will die!
  2. If you're hand picking the mussels at the store (or sorting through them at home), keep only the ones that are closed and unbroken. They're closed because they are scared, little mussels. Scared, closed mussels = alive mussels. Alive mussels = Success.
  3. After cooking your mussels, throw away the mussels that haven't opened. The theory is that they open up when they're exposed to the boiling liquid/steam. If they're already dead, they wouldn't have that reaction. (This has been up for debate but better to be safe than sorry)
"Do not get her sick" RECAP
  • Before cooking: Closed, scared mussels = GOOD
  • After cooking: Open, tasty mussels = GOOD 
I feel like we need some sort of mnemonic device...but anyways, on to the recipe:

    Recipe
    Soup to nuts this dish will take about 10 minutes. It's incredibly quick and simple. The hardest part is just remembering to follow the DO NOT GET HER SICK rules.
    • 1.5 lbs of fresh mussels
    • White wine (preferably dry, preferably room temperature)
    • Butter
    • Salt, Pepper
    • Onions, Garlic, Shallots (At least some combination of them)
    • Sourdough bread (Sliced)
    • 1 Large-ish pot for cooking the mussels

    Steps:
    Prep
    DO THIS BEFORE SHE ARRIVES (perhaps 20 minutes beforehand). Girls love to see you cook but they don't enjoy watching you clean seafood. You'll need to clean and de-beard the mussels. Check out the steps here: http://allrecipes.com/howto/cleaning-mussels/. If you are having trouble de-bearding them with your hands, use pliers (but hopefully it shouldn't get to that).

    The Mussels
    1. Roughly chop the onions/garlic/shallots
    2. Saute 1/4 stick of butter with the chopped ingredients over medium-high heat.
    3. Saute for a minute or two until fragrant and translucent-ish (doesn't need to be an exact science)
    4. Pour in about a wine glass full of white wine (Lets be honest, guys don't have measuring cups. My rule of thumb is about 1/2"-2/3" of an inch of wine)
    5. Turn up the heat so the wine starts to boil and steam
    6. Throw in the closed mussels
    7. Cover, lightly shake the pot occasionally
    8. Mussels will be in done in 2-3 minutes. I usually do just under 3 minutes. The mussels are done when they open up, but try not to cook past 3-4 minutes, they'll get rubbery.
    9. Remove from heat
    10. Remove mussels from the pot with a slotted spoon (but KEEP THE BROTH) and place into a separate bowl
    11. Throw away the closed mussels
    12. Cover the bowl with foil (we need to keep these warm while we make the broth)

    Garlic, Onions, Shallots w/ Butter
    Mussels in the pot
    Mussels DONE

    The Broth and Bread
    Who are you kidding? Mussels are great BUT what really brings it together is that tasty, slightly buttery, white wine broth that's soaked up with crispy sourdough bread. If you've followed the recipe above, your broth should be almost there. It should be near perfect, but here is a list of steps to give it a little more love...
    Sweet Sweet Broth
    1. Turn the oven to 350 degrees and throw in some slices of sourdough bread
    2. Put the mussel pot back on the stove on High (with the remaining broth from step 10 above)
    3. Add a little bit of wine (1/4 wine glass should do it)
    4. Add another 1/4 stick of butter (don't tell her you're doing this)
    5. Add a few dashes of salt (I like pepper as well)
    6. Stir occasionally and boil down the liquid for a few minutes (tasting periodically)
    7. After a few minutes you're set
    8. Strain (or don't strain) the liquid and pour it over the mussels
    9. Remove bread from oven
     
    Eat and enjoy. Secretly bask in the glory that you're now an esteemed and established cook of French cuisine.

    Tuesday, July 10, 2012

    From calzones to pizza: The "art" of homemade pizza


    Don't worry - if the dough sticks, if you forget the flour, if you forget a pizza spatula, a calzone is a perfectly acceptable result...

    ***

    Six years ago, during a rare snow day in DC, my girlfriend at the time and I decided to try and make homemade pizza. Arriving around lunch time, she brought over fresh dough from Whole Foods and an eclectic mix of toppings. Armed with memories from my college summer job at an Italian restaurant and a new pizza stone. We were ready.

    Flour down. Oven at 475. Dough? Refusing to stay flat.

    Oven preheated. Flour everywhere. Dough? Finally flat, cans of soup at the corners, like turrets on a castle, keeping the dough from contracting...(can you tell we're novices?)

    Sauce. Cheese. Pepperoni. Black olives. Onions. Mushrooms. This is going to awesome.

    BUT

    No one ever tells you that when you're prepping pizza on your counter top, you'll need to somehow transfer said pizza into the oven. Its all fine and good with those ultra thin, sheet metal-like pizza spatulas. But your standard, encyclopedia-level thickness, $15 dollar, wooden spatula would be better suited for kindling.

    Wedge. Pull. Knife. Flour. Wedge. Scrape. 1/3 of the pizza down.

    The thin pizza combined with the lack of flour on the counter top squished our pizza. Dough was everywhere. Our solution? Go with the flow, finish folding the dough over. CALZONE TIME.

    Second effort? Calzone time, part deux....


    Fast forward...

    But now six years later, its finally pizza time (did it take me six years to learn how to go from calzone to pizza? Yes, although I probably only make pizza about twice a year. But, um...disregard that thought while reading my tips below...)

    Making dough is great (and more power to you if you're at this level) but you can't go wrong with store bought fresh dough - I know Whole Foods sells it, other places should as well.

    I go "dough to oven" and skip the "counter top middle man" - I have yet to figure out how to get the dough to lay flat on a counter top without it contracting. My first approach was to take some dough, add flour, kind of toss it around, stretch it, maybe use a rolling pin a little bit, and finally take four cans of soup to each of the corners. Once souped up, I'd let the dough sit for a minute or two, and then finally the dough seemed to cooperate. But I'd still be left with the whole counter top-to-oven, calzone problem...

    Since then, I've found that my best strategy is to work the dough with your hands, continuing to rotate it like a disc, slowly letting gravity do the work. Once the dough is of proper oblong size, my sous chef pulls open the oven door, and I put the dough directly on the hot pizza stone. This seems to fix my contracting dough problem...

    I avoid the "calzone" problem by topping the pizza in the oven - I may lose about a minute or two of heat, but I'll sacrifice that for serving pizza not rolls of dough.


    Use a pizza stone AND keep it hot - I preheat my oven to 475 degrees. I avoid cookie sheets. I avoid the metal grates. That $20 pizza stone will give you some incredible crust.


    Still attempting deep dish pizza in my cast-iron skillet - I'm almost there. I tried it for the first time (sans internet help) last week. I feel like I'll only need about 3 more years to perfect it.


    You don't need a pizza cutter - A cleaver. A chef's knife. All perfectly acceptable slicing tools.

    The salad bar is an excellent avenue to forage for toppings that would be too expensive to buy a la carte

    The six years in the making "recipe:"
    • Store bought dough
    • Sauce
    • Cheese
    • Foraged salad bar toppings

    1. Preheat oven to 475
    2. Take a baseball-sized portion of dough and use your best technique to get it pizza-topping-worthy (see my method above)
    3. Cook dough for 2-3 minutes BY ITSELF
    4. During this time, get your sauce, cheese, and toppings prepped and close to the oven
    5. Open the oven, and use a knife to poke out any air bubbles
    6. Prep the pizza while its still in the oven. Shoot for a two minute pit crew time. (The pizza stone just seems wayyy to hot to pull out of the oven)
    7. Close. Timer to 10 minutes. (If you use fresh herbs or other high-heat sensitive toppings, try putting them on with about 3 minutes left)
    8. After 10 minutes check the state of the crust. The crust will tell you everything. (With my oven and two topping rounds, it takes about 16/17 minutes)
    9. Once the crust looks good, use your giant spatula to remove pizza
    10. Transfer to cutting board.
    11. Cut.
    12. Eat.
    Four interesting good pizza combinations:
    • Bacon + Blue Cheese + Red Onion
    • Black Olive + Pepperoni + Fresh Basil
    • Black Olive + Tomato + Cilantro + Feta 
    • Tomato + Cilantro + Jalapeno + Red Onion